How to Paint Baseboards: Achieve Professional Results with Ease!

Painting baseboards is a minor detail in home improvement. Still, it plays a significant role in giving your space a polished and professional look. A well-painted baseboard can enhance the overall aesthetics of a room, providing a clean, finished appearance. Whether you are a seasoned DIY enthusiast or a novice looking to tackle your first project, this guide will walk you through painting baseboards, ensuring you achieve professional results quickly.
Preparing for the Project
Proper preparation is crucial before diving into painting. Begin by gathering all the necessary materials: painter’s tape, drop cloths, a putty knife, sandpaper, a high-quality paintbrush, and your chosen paint. It’s essential to select the right type of paint; semi-gloss or gloss finishes are commonly used for baseboards as they are durable and easy to clean. Additionally, ensure you have a clean, dust-free workspace to avoid any debris getting onto the wet paint.
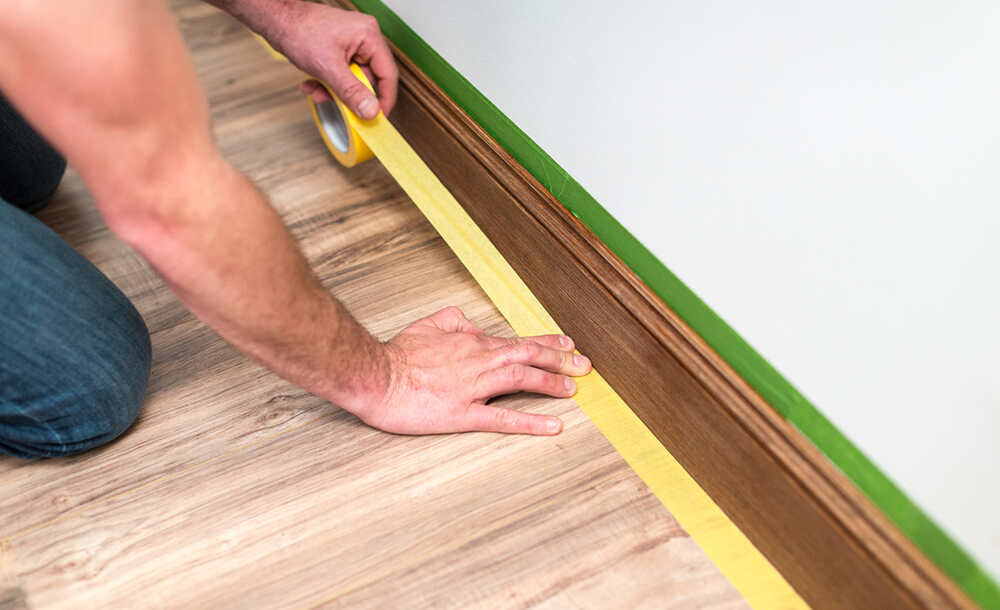
Start by protecting your floors and walls. Lay down drop cloths along the base of the walls to shield your flooring from paint splatters. Use painter’s tape to mask off areas where the baseboard meets the wall to achieve clean lines and prevent paint from bleeding onto the wall surface. This step might seem time-consuming, but it significantly affects the final result. Next, inspect the baseboards for any damages, such as cracks, holes, or peeling paint. Use a putty knife to fill any gaps or imperfections with wood filler, allowing it to dry completely. Once dried, sand the baseboards to create a smooth, even surface. Wipe away dust with a damp cloth, ensuring the baseboards are clean and ready for priming.
Priming the Baseboards
Priming is a critical step that shouldn’t be overlooked, as it ensures better paint adhesion and durability. Choose a high-quality primer suitable for the material of your baseboards, whether it’s wood, MDF, or another type of trim. Apply the primer evenly, using a paintbrush or a roller designed explicitly for trim and baseboards. A good primer will seal the surface and cover any stains or discolorations, providing a uniform base for the paint.
Allow the primer to dry thoroughly, which usually takes a few hours, depending on the product and environmental conditions. After the primer has dried, inspect the baseboards for rough spots or drips and lightly sand these areas to achieve a smooth surface. Wipe away any sanding dust with a clean, damp cloth. This step ensures that your paint will go on smoothly and adhere properly.
Painting the Baseboards
Now that the baseboards are primed and prepped, it’s time to start painting. Stir your paint thoroughly before beginning to ensure an even color and consistency. Dip your paintbrush into the paint, wiping off any excess on the edge of the can to prevent drips. Start painting at the top of the baseboard, working your way down in long, even strokes. Using a steady hand and maintaining a wet edge is essential to avoid lap marks.
When painting baseboards, thin coats are better than thick ones. Applying multiple thin coats will produce a smoother finish and reduce the risk of drips and uneven coverage. Allow each coat to dry completely before applying the next. Most baseboards require two to three coats of paint for optimal coverage and durability. Patience is key here; rushing through the coats can lead to a less-than-perfect finish.
Finishing Touches
Once the final coat of paint has dried, carefully remove the painter’s tape. To avoid peeling off any paint:
- Pull the tape away at a 45-degree angle. If you notice any areas where the paint has bled under the tape, use a small brush to touch these spots.
- Inspect the baseboards for any imperfections or missed areas, making touch-ups as necessary.
- Clean your brushes and other tools used during the project, ensuring they are ready for future use.
Maintaining Your Painted Baseboards
Regular maintenance is essential to keeping your freshly painted baseboards looking pristine. Dust and clean the baseboards periodically using a soft cloth or a duster. Use a damp cloth with mild soap for more stubborn dirt or scuff marks. Avoid harsh chemicals or abrasive cleaners, as they can damage the paint. By keeping your baseboards clean, you can extend the life of the paint and maintain the overall appearance of your space.
Troubleshooting Common Issues
Even with careful preparation and execution, you may encounter common issues when painting baseboards. Understanding how to address these problems can help you achieve a flawless finish.
Paint Drips and Sags
Paint drips and sags often occur when too much paint is applied in a single coat. To fix this, lightly sand the affected area once the paint is dry, and then apply a thin, even coat of paint over the sanded area.
Uneven Coverage
Uneven coverage can result from inadequate priming or needing more paint coats. Ensure that your primer covers the baseboard thoroughly, and apply at least two coats of paint for an even finish. If the baseboard still appears patchy, a third coat may be necessary.
Brush Marks
Using a high-quality paintbrush and applying paint in long, even strokes can minimize brush marks. If you notice brush marks after the paint has dried, lightly sand the surface and apply another thin coat of paint.
Paint Bleeding Under Tape
To prevent paint from bleeding under the painter’s tape, press the tape down firmly to create a tight seal. If bleeding does occur, use a small brush to touch up the edges after removing the tape.
Conclusion
Painting baseboards is a manageable and rewarding project that can significantly enhance the look of your home. You can quickly achieve professional-looking results by following these steps and paying attention to detail. Preparation is essential: take the time to properly clean, fill, and sand your baseboards before painting. Use high-quality materials, apply thin, even coats of paint, and be patient throughout the process. With these tips and techniques, your baseboards will look freshly painted and polished, adding the perfect finishing touch to any room.
Do Read: Comprehensive XCV Panel Guide: From Basics to Mastery


